

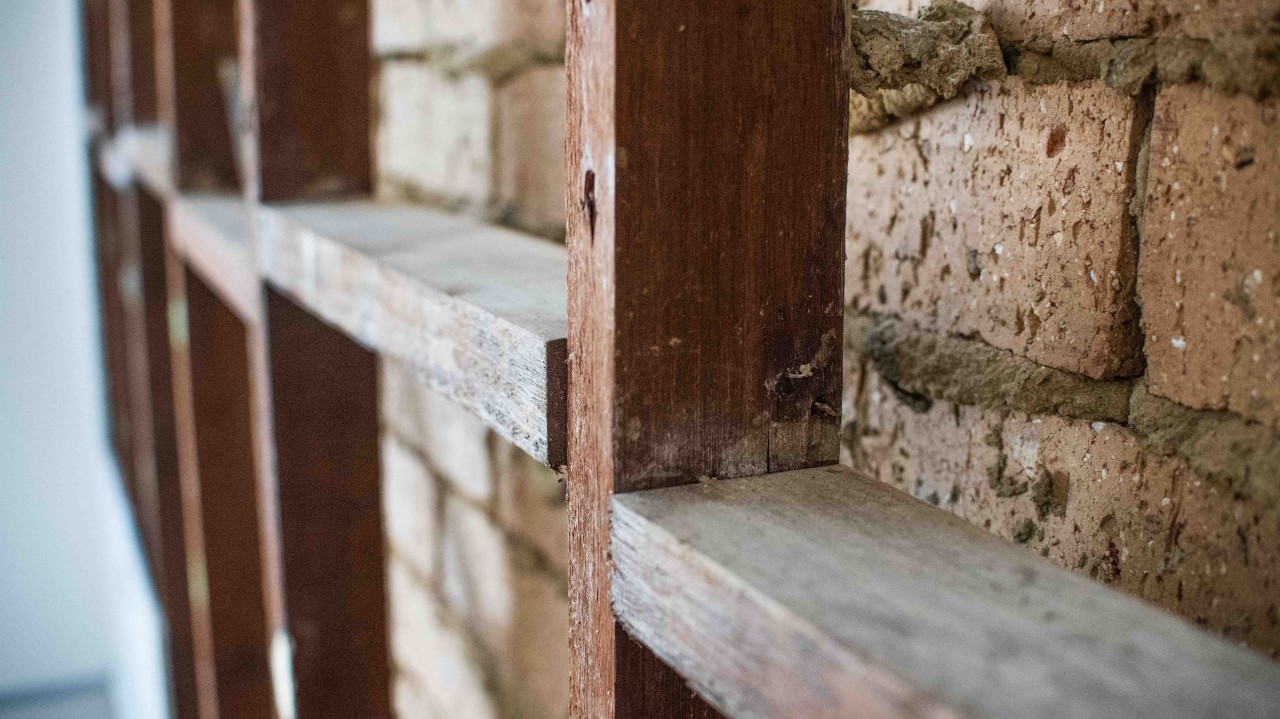
Temperature highs in Queensland’s summer regularly float into the 30 Deg Cs, averaging at 29C in January.
When the sun had gone down, heat seemed to radiate from our gable end wall into the bedroom all night long. By the time it had cooled down, the sun was coming back up to reheat it all over again.
Then with winter it swings the other way. It’s bloody freezing in that bedroom at night.
My kids had enough, and my wife had had enough.
“We can’t go another summer without aircon in the boy’s bedroom.”
Pretty straightforward: A room heats up. It doesn’t have adequate mechanical means to cool it down. Therefore install the mechanical means to cool it.
Is it as simple as that? What about what you can’t see, what’s concealed? Do you have a full understanding of the building fabric’s thermal performance? Is there something we can do to keep it warm during winter too without overly relying on a heater?
The midday to setting sun during summer essentially blasts one of the room’s four walls. An externally finished brickwork gable end wall of a brick veneer timber framed house.
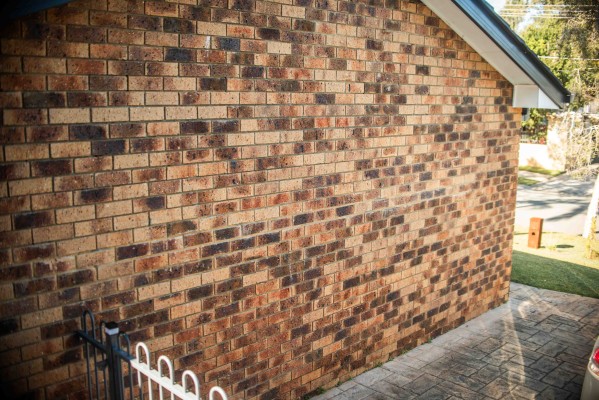
The sun spends hours bringing each one of these bricks up to temperature.
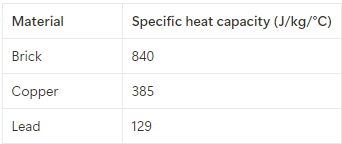
To compare, lead will warm up and cool down fastest because it doesn’t take much energy to change its temperature. Brick however will take much longer to heat up and cool down. This is why bricks are used in storage heaters as they stay warm for a long time.
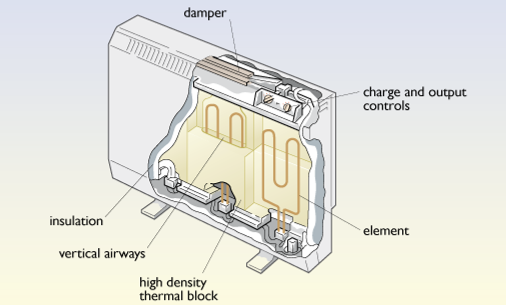
Most heaters are filled with oil (1,800 J/kg°C) or water (4,200 J/kg°C) as these emit a lot of energy as they cool down and, therefore, stay warm for a long time. [1] Each summer the gable wall of our house became an unwanted, 8m2 sized, storage heater powered entirely by the sun.
How do we augment the thermal performance of our walls, ceilings and roofs? Using insulation. A wall is a building element that is the sum of its components; all together they make a wall. They work together to fulfil the performance characteristics of the wall: it’s structural strength, acoustic performance, weathertightness, and it’s thermal performance.
To my wife, these are new observations.
“Consider that it’s possible to not only limit the transfer of heat from the bricks radiating into the room at night, but stop heat escaping from the room during winter”
“Isn’t that what insulation does?”
“That’s right. So thinking about that first, what might the existing conditions be inside the wall?
“…I don’t know”
Time for some deductions.

“Since this house is 40 years old, it’s possible all the old insulation has dropped. It’s possible there’s no insulation and just foil.”
“What does this have to do with the AC?”
“I’m guessing you’d prefer it if the AC didn’t have to work extra hard to cool the room down, therefore making it last longer before it breaks down. Or to not spend extra money on energy because all the heat just flies through the walls to outside?”
My wife is a florist with a degree in fine art,
“You don’t have to be such a smart arse you know.”
So with our observations about how a wall should be built in best practice, come new deductions we have to work to eliminate, so we can reach our most probable conclusion (ODEC).
I carefully explained to my key stakeholder how it was highly likely that we needed to upgrade the insulation inside the wall before we install air conditioning.
“So can you drop it in from above, from inside the roof?”
“Well, no. The wall is a timber frame. Structurally that frame is not unlike a picture frame, long pieces of timber which form all four sides. The piece along the top is called the top plate. The top plate is in the way and you can’t cut it apart to drop insulation down”
“….”
“I have to cut the plasterboard off the wall.”
“This is turning into a horrible job!”
Cutting a plasterboard section off of your stud wall is not as dramatic as you think. With key considerations to keep in mind to mitigate any drama along the way.
- use a stud finder to located the vertical timber studs, and the horizontal timber noggins
- use a strong magnet to locate screws. If you’re lucky when you drill through the plaster you’ll find a screw you can reverse out and screw back on, and not framing nails (like I did)
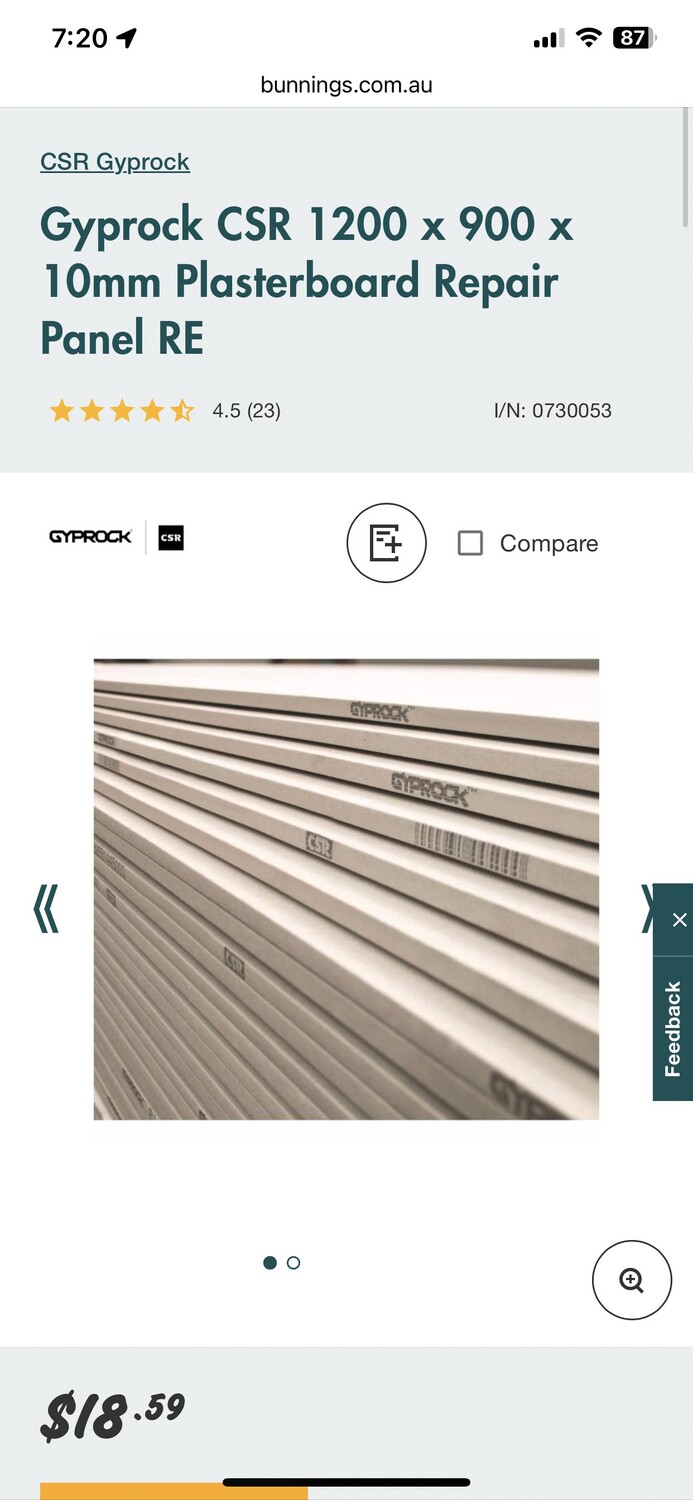
- confirm the size of sections of plasterboard available from your local hardware store where lowest prices are just the beginning
With these variables confirmed, you can get ready to cut a section off the wall. The whole idea here is to take the section off strategically allowing you to rescrew it back onto the timber studs, plaster all four cut edges, then sand and repaint. Do it well enough and no one will ever notice you took it off. If you accidentally break the section you removed, you can easily buy a nice new panel of the same size.
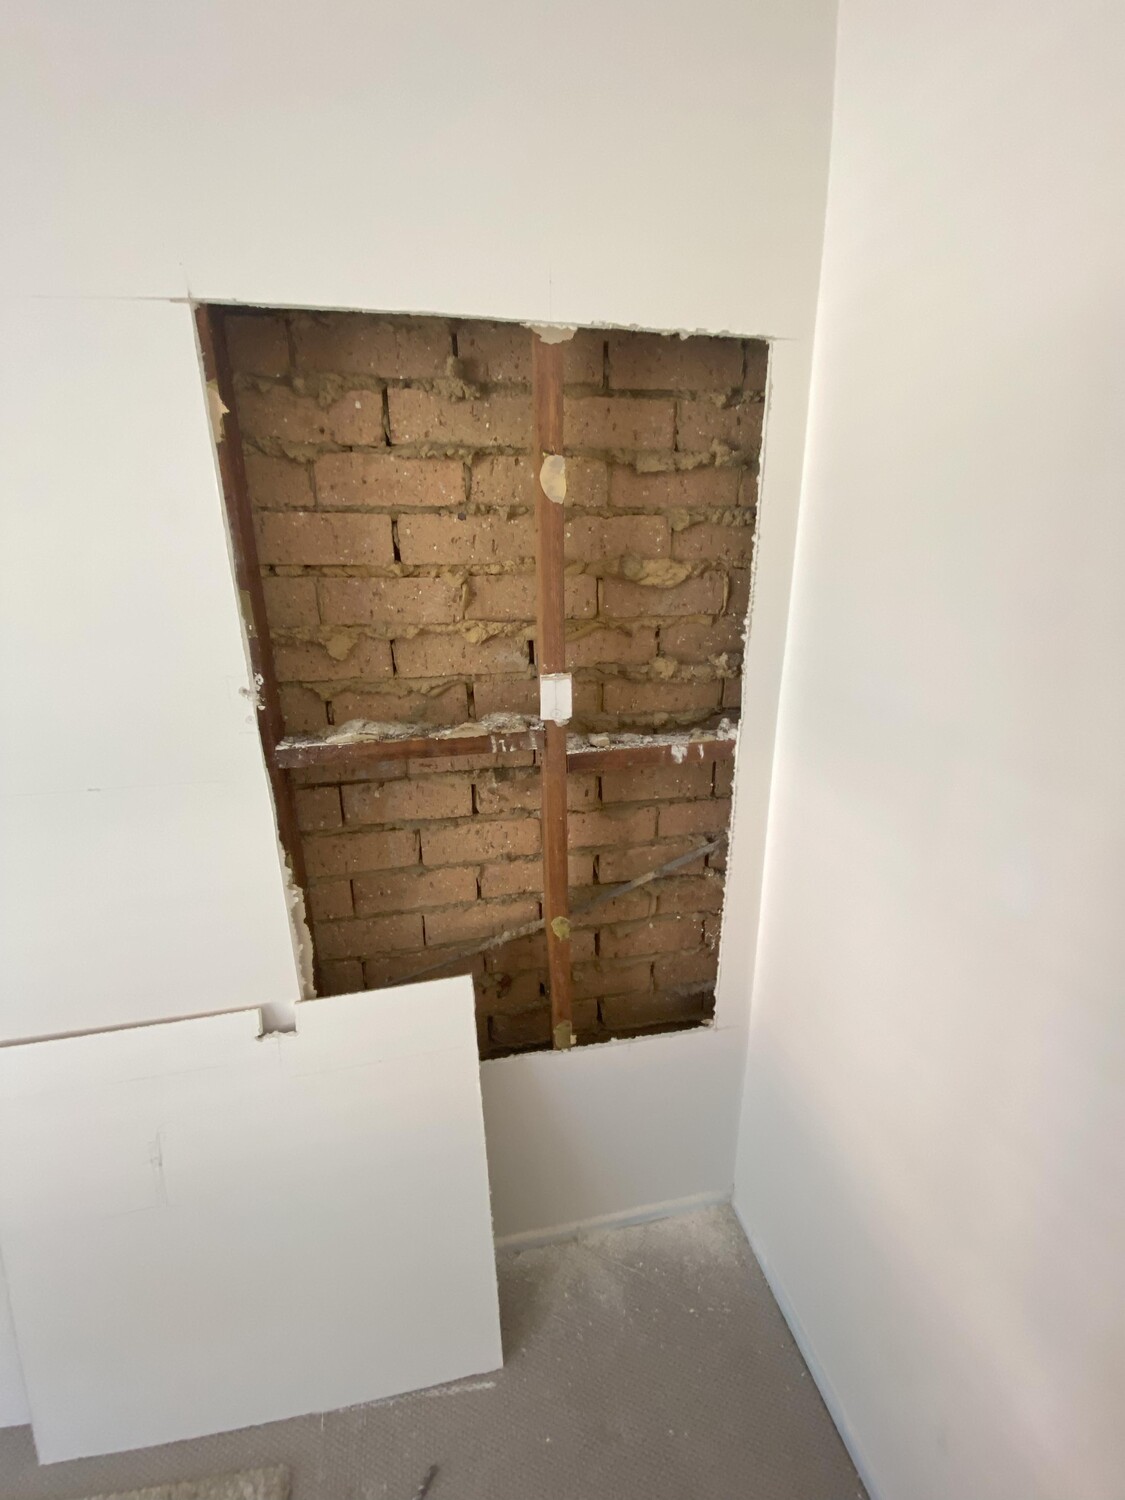
The overall mission is to slide new insulation up between each pair of timber studs by cutting open 600mm above and below the noggins.
“…oh crap”
This winter has been particularly cold, beaten only by 2022.[2] I couldn’t blame Redditor u/ALBastru from asking r/Australia “Why are so many Australian homes either too hot or too cold?” A quick scan of the comments drew out a few Canadian Redditors in particular, describing Aussie winters as “insufferable”, and understandably confused since they were used to indoor comfort withstanding -25C winters. Knowing a little about how we control the thermal performance of our buildings, I got curious: what is the minimum R-value of insulation installed in a Canadian house for it to remain comfortable inside when outside is -25C?
R-value is the metric used to describe the resistance of the transfer of heat. So if you buy a material, particularly insulation, the manufacturer will have tested it to confirm it’s R-value which you can read on the packet or spec’ sheet.
Using the NCC I determined the the minimum required R-value for my home which uses a cold roof ventilated using two wind-driven roof ventilators in Australia climate zone 2 (an altitude less than 300m) is between R-3 and R-6.[3]
In Canada, the recommended minimum R-value for attic insulation per their building codes is …R-50.[4] If the Canadians are wondering why the heck their Aussie digs are so bloody cold in the winter compared to their native tundra, it’s probably because there’s zero insulation in the walls, all the whilst they are used to living inside a house sized, meter thick, Thermos flask. They might as well be sleeping outside.
Back to the job at hand, not only was there no old insulation to be found, there wasn’t even foil. Not that it mattered terribly at this point since the intent was to get new present day insulation in there anyway. My attention was now turned however, to the matter of evidently zero moisture barrier between the outside wall and the inside wall.
“What’s the problem now?” my wife, exasperated
“Well… from inside the roof the waterproof membrane is visible at the top of the wall. From the outside, the same membrane is visible as a damp proof course at the bottom of the wall. So I assumed the whole inside face of the brick wall already had a moisture barrier.”
“Great. And it doesn’t. Why’s that a problem?”
“This is just a 100mm thick brick wall. It’s designed to get completely wet. So wet in fact, that this inside face is allowed to have water gently run down the back of it, so long as it stays behind this moisture barrier at the bottom here. That’s what stops our floor from getting wet”.
“…”
“…we can’t let the insulation just lean right up against this brick wall. It would get mouldy within a few years and cause all sorts of problems”.
“What does this mean????”
“I have to remove the entire plasterboard so I can line the cavity with membrane before putting the insulation in.”
“If this is how you reveal bad news to all your clients then you are terrible.”
“Noted.”
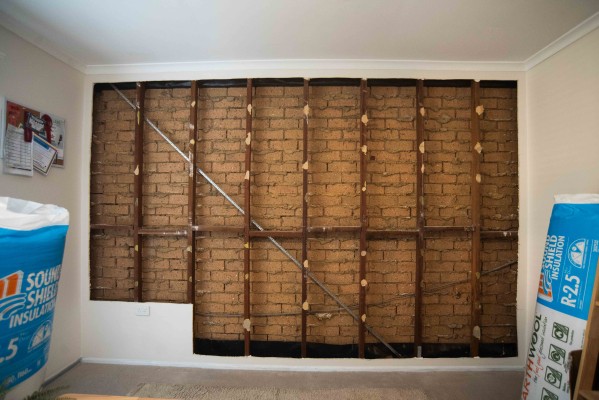
This is the common construction of brick veneer housing in south east Queensland, of which the existing stock is in excess of 40 years old. Building a new house to meet the requirements of NCC today requires insulation to form a continuous thermal barrier with ceilings and walls. In the 1980’s doing such a thing may have been considered a luxurious but unnecessary addition.
Today it is necessary.
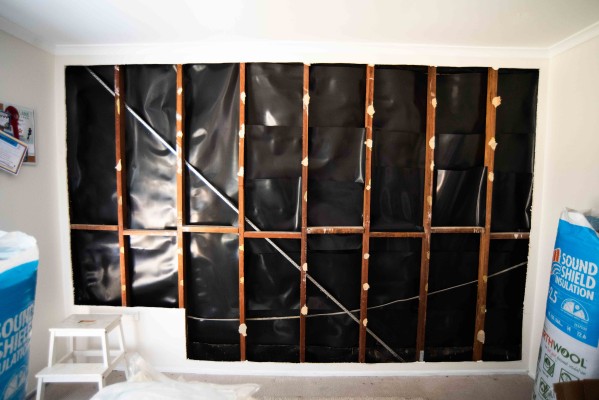
I might have used an actual vapour control sheet here, like Ametalin or Visqueen, that facilitates moisture transfer one one direction but not the other. Instead I used builder’s plastic that I already had to hand. Why? Because our plan is to extend the house at this gable and this wall will be demolished.
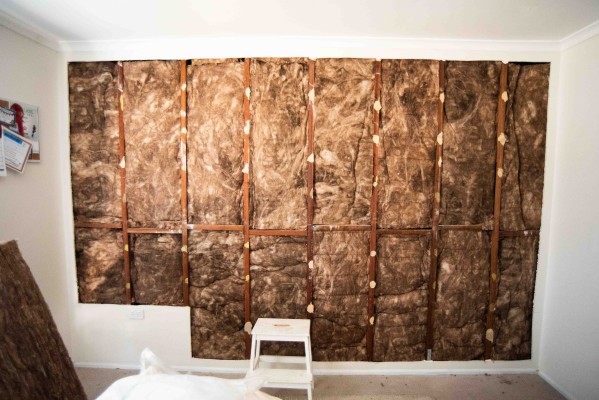
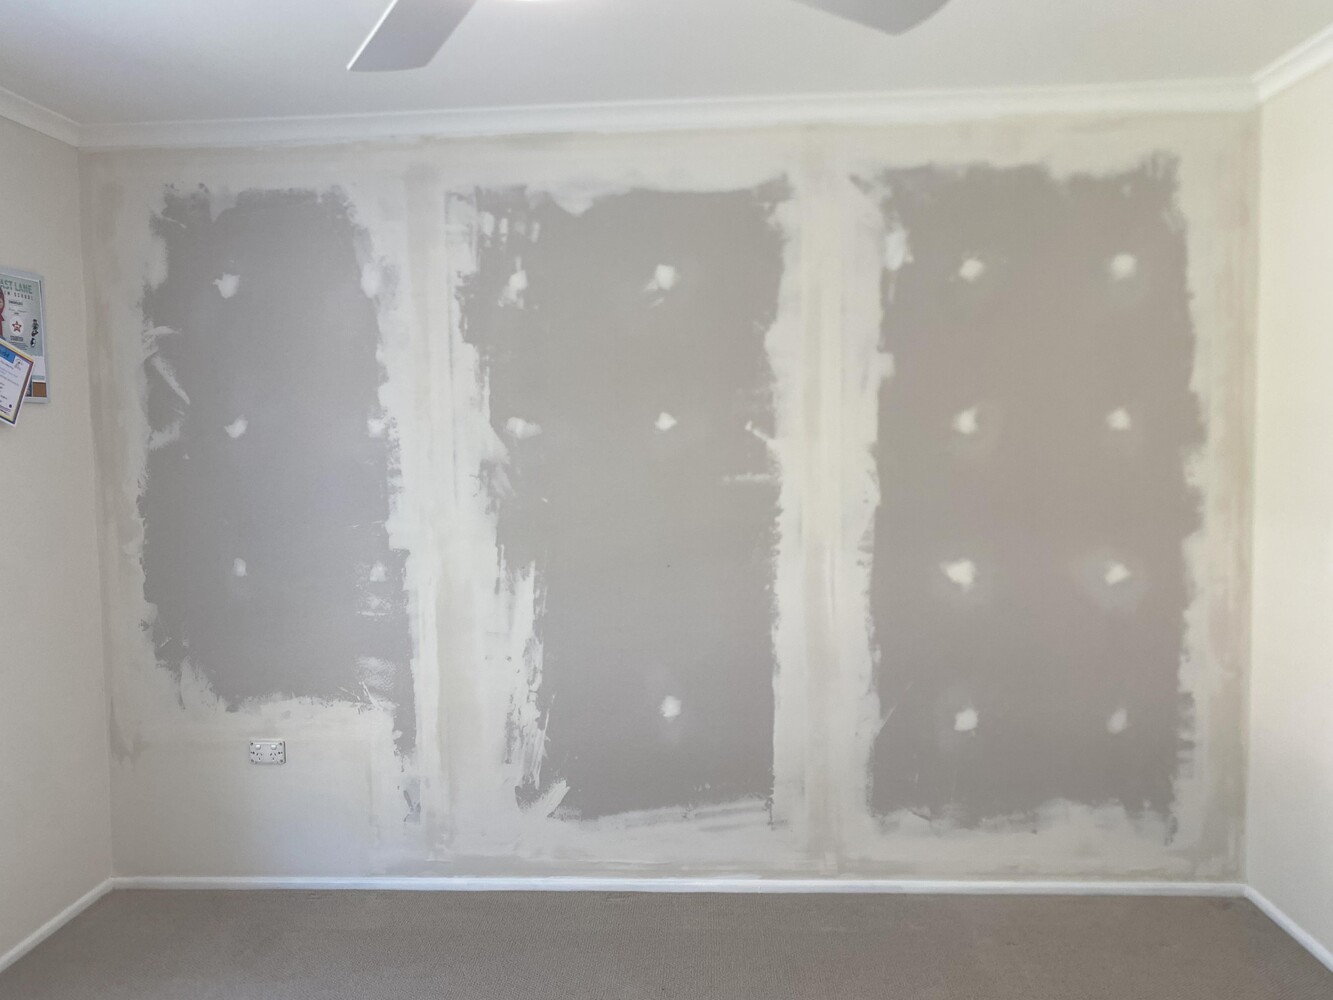
All the materials needed to complete this job came to less than $350, which included around 10m2 left over insulation I deployed above the bathroom. The time cost however… as a DI-Why-er I lost track of the hours I spent. It’s easily more than two full days, so at an hourly labour rate of say a modest $65/hour this work is feasibly worth between $1,500 and $2,000. At that price, I’d demand your butt-joint taping, plastering, sanding and painting, had better be a damn sight better than mine.
CJLM
[1] Energy and heating – AQA Specific heat capacity, BBC, https://www.bbc.co.uk/bitesize/guides/z2gjtv4/revision/5 [2] Australia shivers through June and July, so was the BOM’s forecast of a warm winter wrong?, ABC, https://www.abc.net.au/news/2024-08-03/australia-suffers-cold-winter-weather-despite-mild-forecast/104176284 [3] Part 3.12.1 Building fabric, NCC, https://ncc.abcb.gov.au/editions/2019/ncc-2019-volume-two/part-312-energy-efficiency/part-3121-building-fabric [4] Cracking the Code: R-Value Demystified for Energy-Efficient Canadian Homes, Canadian Geographic, https://canadiangeographic.ca/live-net-zero/articles/cracking-the-code-r-value-demystified-for-energy-efficient-canadian-homes